Tuesday, June 14, 2011

Valentine's Day Decor - Table Mat

Hi All,
These are the diy Table Mats i made on last valentine's day. My hubby loved them :)


 Table Mats for a romantic evening


 Be very careful while using vinyl sheet, it sticks very fast & very hard. Secondly never use glue to attach paper to foam sheet. This was my first attempt so u can see both of these mistakes in this one.


Material I used.

Its, a very simple project. Material I used are,
> White Paper sheet
> Pink Color Wrapping sheet
> Black Color Foam Sheet, for the base
> Colored Markers
> (& my fav) Transparent Vinyl Sheet
You can find Tutorial here.

Enjoy Making.

Regards

Father's day - table mat


So,  Father's day is coming in few days... i m so excited. its one my favorite days of the year. 

I remember when i was 5 years old, our country president died in plane crash... everybody was sorry & was enquiring, who will be the next president. I remember, i used to think people are so dum... they r curious to know, who will be the next president...OH PLZ, dont they know abu (dats wht i call my dad) is the only wisest person around, and NO ONE but ONLY abu can take care of this country now... 

I was so inspired by my dad... dat i always used tell my friends... dat my dad is perfect, just perfect... :)

My father is my hero, he was, he is and he will always be. He is a completely self-made, retired army officer. He is the most Wisest, Strongest, Handsome, Honest, Respectable, Amazing person i know. I am really proud of you abu. I luv you Abu g, May Allah give me enough strength to follow your foot steps in every single way. And Allah please give my Abu long & healthy life. LIFE FUL HAPPINESS....


Proud of my dad.


Now I am a mom of two adorable boys... and i really want to make this day memorable for them... (they luv their dad, more then me.... grrrrr)

Preparing for Father's day so, today me & my elder son made this father's day table mat... i did the job but he instructed for the colors & writing :)


father's day table mat


 Material We Used...

>Brown sheet which is used to cover notebooks (one side was glossy, other was plain)
>Transparent vinyl sheet
>White Paper
>Colored markers


Material used

design, white paper boarder

After coloring
then we attached white boarder with brown sheet.

added some more color


then we used transparent Vinyl Sheet


we placed it on vinyl sheet, upside down, so it sticks.


& then folded the remaining sheet on the other side.


& DONE.

Enjoy making.

Regards
Irum.

Thursday, June 9, 2011

An Un-finished Business (Oil Painting)

I started this painting during my pregnancy. I had severe mood swings during dat time, and just to keep my mind busy somwhere i started it. I painted this from a photograph, showing a beautiful view of Italy...


I wanted to complete it BUT, one day while I was sleeping, my elder son Mohammad couldnt hold his creativity back & i m sure you can see his input...


I was angry that I threw it behind my bed and it stayed there until we moved to new appartment. Almost a year back when we were shifting ... my husband discovered it... :) and hung it in our couridoor.


I dont feel like finishing it... water, sky both need some work.... its still not finished... and as my husband say... "i think its going to stay unfinished, as Leonardo's Mona Lisa" hehheheee lol

Have a great day,

Regards
Irum.

Dubai - Mouth Watering Offers

The Body shop Sale is On... 
at Deira City Centre, Mall of the Emirates, Mirdif City Centre and The Dubai Mall.


Center Point Sale..... WOW i love it... now they are offering 70% off on part sale


Naturalizer Summer Sale ...

Tuesday, June 7, 2011

STOP......Need to organize myself...

BREAK thats what i really need.......

A little background, during my student life, I was really in to crafting, all sort of painting, mirror etching... etc. My mom always wake up early in morning for prayerz, I remember there was a time, when the first thing she used to do, was to check my room... for some new stuff.... specially during vacations I was literally making something every night.... which means 7 projects a week... :)
 
Then i started working & den got married.... got so much busy in my life dat i cud hardly dream of crafting...

Recently when my hubby... asked me to start a blog for all that i make occasionally,... i was really thrilled... (i needed sumone to push me, and thanks to hubby who did that) So, I started a blog, I was super excited. In the last couple of weeks the only thing I could think of, was CRAFT.... in all this excitement i missed few thingz, i didnt do laundry Ooopppssss....


Didnt clean my kids wardrobe...


Didnt do any detail cooking....


And on top of it all my little one (Ali) got viral infection .... :( had high fever....


Before blogging, i used to craft occasionaly (once in a month or so) so i had no problemz
but now i was giving more time to my hobby so it was different...

I was really thinking... why out of nowhere i m making life difficult for me...? why am I blogging...? & today I got answer

I AM BLOGGING BECAUSE....
~ Blogging has made me a happier person (now i can experiment all those things, which i really really wanted to do... )

~ Blogging has made me a more active person (I really feel like finishing my household chores so that i can blog, i have something to look forward to...)

~Blogging is a healthy activity, and the best part is that i get to know like minded people, with same interests. Learning a lot everyday.


~And because,
SO the crux of my story is, ITS GREAT TO BLOG UNLESS AND UNTIL YOU CAN ORGANIZE URSELF & FULFIL YOUR RESPONSIBILITIES SIDE BY SIDE.So, ill keep blogging... but first thing first.... I have prior responsibilities to take care of... Blogging is no fun unless your mind is relax and free..

have a great day...
enjoy ur life

irum.


Sunday, June 5, 2011

Happy birthday Mohammad

My Mohammad'z Birthday.... at school


Cake favour box tutorial 
Mustache tutorial

regards.

(Part : 5) Finally.... all ready, My Big One's 5th birthday giveaways done!

Happy birthday to u,
Happy birthday to dear Mohommad.....


Happy birthday to u.

Finally, its his birthday today... he was sooooo excited, counting days, then hours and last night he was literally counting minutes...
Today I finally decorated the cake giveaway boxes...

all set
Ok, So now tutorial...
Cake boxes I made of orange color sheet tutorial u can find here.
Mustaches & Lips give away tutorial you can find here.

I used these adorable little bee chocolates to decorate cake boxes. The box cost me 16 DHS... and there were more then 50 chocolates in that box.

chocolates, used to decorate favor boxes

spare chocolates

cardboard, for the base
Used this card board, as a base of the cake.

cake box with double sided tape
Used double sided tape to attach boxes with the base.

packing material, to support the next layer
 Keep some distance between the boxes, to set 11 boxes in 1st layer. Once the 1st layer was set on the cardboard, put packing material in the center which will support the next layers.

1st layer
 11 favour boxes were used to make the first layer.

Second Layer
 Once 1st layer is done, start second layer using 8 boxes (with no bee chocolates on the top), keeping boxes close this time. Use 2 double sided tapes on both sides & 1 at the bottom.

3rd layer
 Use the same instructions now start 3rd layer (with 8 boxes having bee chocolates on the top).

Alomost done
 Fix last piece carefully.

Ribbon, used to keep the boxes togther
 Then Brown color ribbon was used with each layer (3 circles) to keep the boxes togther & avoid distance between them.

definatly boxes r full of sweets & chocolates :)

add a little ribbon bow on the top.

AND DONE...

Regards
Irum

Thursday, June 2, 2011

(Part : 4) My Big One's 5th birthday preparationz... Hand printed shirt withour freezer paper :)

OK, so this time i have done my kidoz shirt to wear on his birthday...


I always wanted to print my kidoz shirt with stencil but I couldn't find freezer paper. The last time I asked a grocery guy about freezer paper, he said "madam g, there is nothing like that... u r taking wrong name, it must be sandwich paper, hahahaaa" grrrrr... & after that I stopped searching for freezer paper.

Few months back we went to stationery shop (I luv stationery shops) & I bought black vinyl sheet for no reason, i just liked it. And later I used that to make my sky line wall sticker which came out really nice. This time i have again used viyl sheet as a stencil :) I got this idea just before sleeping... and next day after sending my hubby office and kido to school, it was the first thing i did :) 

Ok, so no more exaggeration.... here are the details.

Plain T-shirt, i used for this project

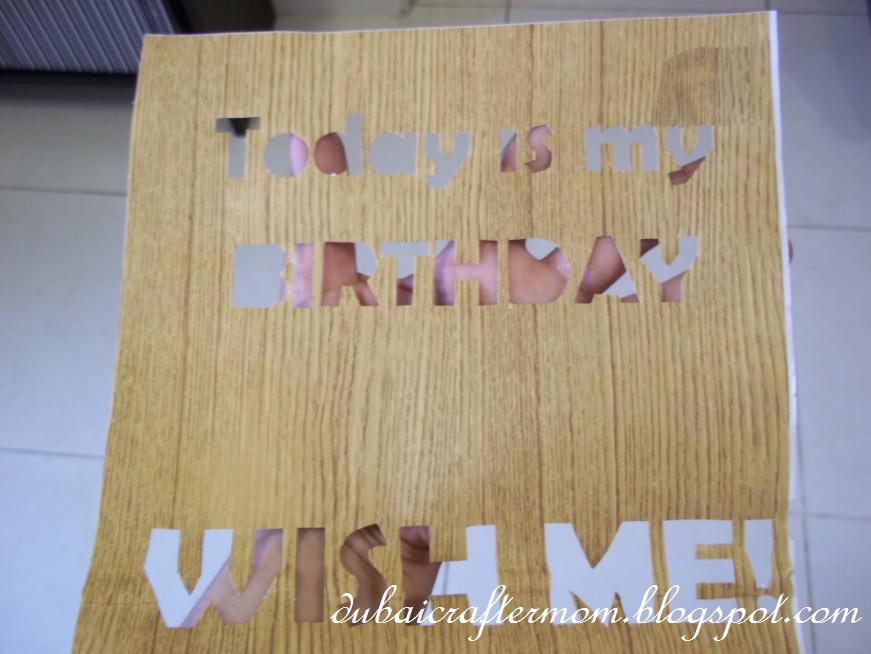
print out "TODAY IS MY BIRTHDAY WISH ME!"
Oooppss sorry about the bad picture, i printed in light color but it was visible.... i used it to cut my stencil.


vinyl sheet
This is the vinyl sheet I was talking about. its like sticker sheet. Its easily available in all hyper markets & stationery shops (small roll is around 15 DHS)


back paper of vinyl sheet is with lines which helps to keep it straight

tapping printout on vinyl sheet
Once i got my printout, i fixed it properly on vinyl sheet with transparent tape, so that it should not move while cutting stencil.


After cutting
I used cutter for cutting my stencil... but i think it will be much more easier to cut it with exacto knife. 


My elder one's name "Mohammad"
I used cut out words to write my son's name :)


final vinyl stencil

Ok, coming back to topic... after removing tapes & printout, I got my final vinyl stencil.

removing the back paper
 
pasted stencil on cloth

It was my first trail with vinyl stencil & didnt want to ruin T-shirt so I printed on white piece of cloth. I pasted vinyl stencil firmly on the cloth.

using newspaper under cloth

if you are trying this, DONT FORGET... to use newspaper under cloth you are going to print, or oil paint will distroy ur table... or whatever u will work on.

sponge, i used for printing

I used blue oil color & sponge to print shirt. (you can also use brush, but sponge was more convienent) 

printing

after printing left it for half an hour to settle

removed stencil after half an hour

saved it on a glossy book cover

I wanted to re-use this stencil as it was in perfect shape after use. At that time i cudnt think of anything else so pasted it on glossy book cover hehehee...

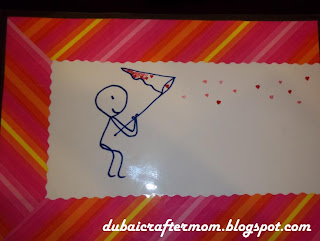
Used DVD marker to outline BIRTHDAY 

I was not having anyyy permanant marker so i used my hubby's DVD marker hehehhe

once dried, ironed it

You can wait for few hours to let it dry... but if u r impatient like me, hair dryer is a great option :). once dried, iron it so the colors settle.

end result

Attached printed piece on T-shirt with needle & thread

Another View

Mohammad was sleeping... but Ali's response made me feel great :)


Shirts with ocassion specific quotes, one can not wear again & again. Printing seperate clothe & attaching it to the shirt will not only look stylish but also later on you can remove this piece & use plain shirt.

have a great day
Regards
bye.